Crevasse Rescue Systems: 3:1 Z-Pulleys and Snow Anchors
When an alpinist breaks through a hidden snow bridge into a glacial crevasse, initial arrest by the surviving rope team members must be instantaneous. However, holding a suspended climber on a dynamic climbing rope is only the preliminary hurdle. Converting that arrest stance into an independent, load-bearing master anchor and constructing an efficient mechanical advantage pulley system requires practiced kinetic discipline under severe cold stress.
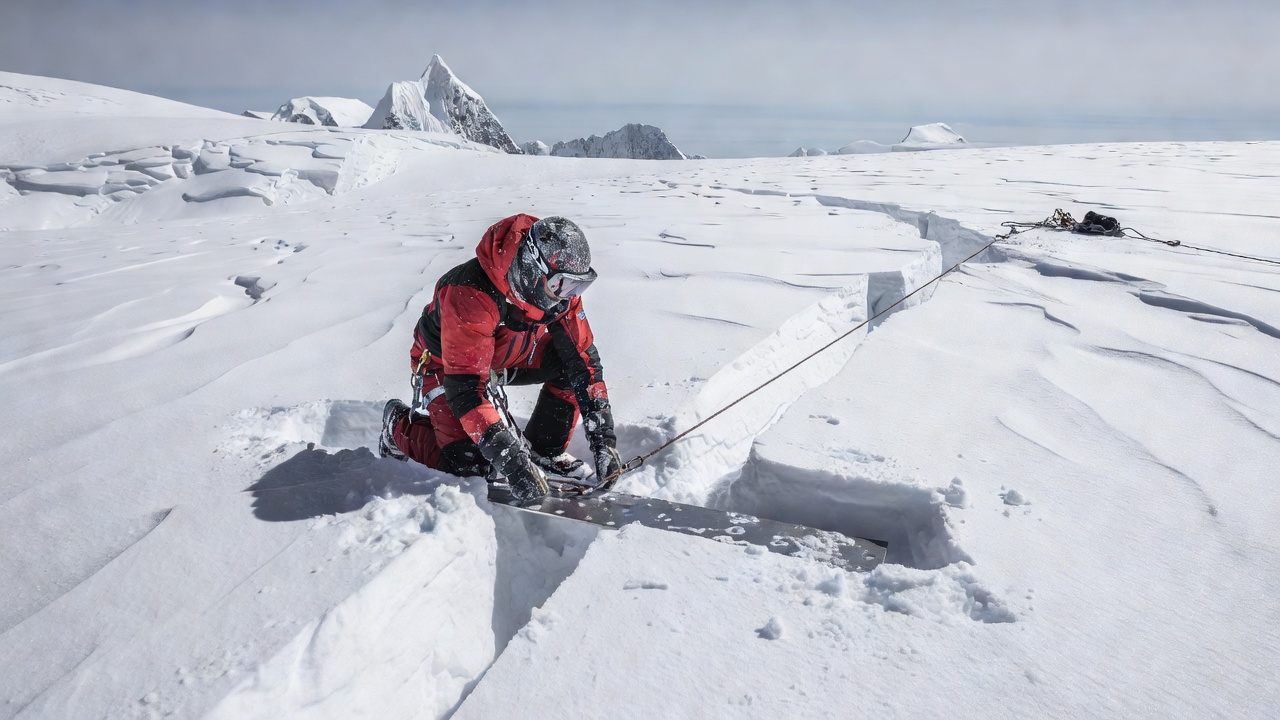
Phase 1: Establishing the Master Deadman Anchor
Never attempt to haul a fallen climber directly from your body harness without first transferring the static load to a bombproof snow or ice anchor. In firm spring firn or névé snow, an aluminum T-slot deadman picket buried horizontally at a 45-degree angle delivers optimal resistance.
Step-by-Step Anchor Transfer
- Sustain the Self-Arrest: Drive both ice axe picks into the slope, kick crampon front points deep, and absorb the initial impact across your pelvis.
- Deploy the Prusik Hitch: Reach to your gear sling with one free hand, affix a 6mm nylon prusik hitch to the loaded climbing rope ahead of your harness, and clip your personal tether into the loop.
- Excavate the T-Trench: Dig a horizontal trench 40 to 60 cm deep perpendicular to the fall line. Cut a clean, narrow exit slot towards the crevasse lip to seat the anchor sling without edge fraying.
- Drive the Picket: Place a 60cm extruded aluminum picket horizontally in the trench, attach a structural runner around its midpoint, and backfill with wet snow, stamping it down to consolidate the pack.
- Transfer the Strain: Ease your body weight gradually until the prusik loop pulls taut against the picket master point. Unclip your harness from the system once tension is fully absorbed by the snow.
The Mechanical Advantage Z-Rig Architecture
A classic 3:1 Z-pulley system multiplies hauling force by three, minus friction losses generated over the crevasse lip and through carabiners. Utilizing high-efficiency progress capture pulleys (such as the Petzl Micro Traxion) cuts friction by over 60% compared to standard carabiner-only setups.
| Rope Team Size | Spacing Interval | Brake Knots | Spare Coil Buffer |
|---|---|---|---|
| 2-Person Rope Team | 16 to 18 meters | 3–4 Butterfly knots on strand | 12–15m per climber for hauling drop-loop |
| 3-Person Rope Team | 12 to 14 meters | Optional on hard snow | Middle climber carries rescue gear |
| 4-Person Rope Team | 10 to 12 meters | Not recommended (drags in snow) | Haul directly using pure body mass |
Mitigating Lip Friction
Under tension, the loaded climbing rope will slice into soft snow at the edge of the crevasse like a cheese wire, burying itself up to a meter deep. Hauling against this trench can create more than 400 kg of resistive friction, completely neutralizing a 3:1 or even a 5:1 advantage system. The rescue team must pad the lip immediately using an overturned ice axe shaft, a composite foam sleeping pad, or an emptied backpack secured to the upper lip before beginning continuous hauling cycles.